해당 포스팅은 Autoencoder를 가지고 궁금한 점을 테스트하며 기록해놓은 글이며, Autoencoder에 대한 설명은 거의 존재 하지 않는다.
해당 오토인코더를 구현할 때 참고하였던 코드는 데이콘 포스팅이다. 그 외 여러 방식으로 신경망을 구성해보며 테스트 한 내용들도 포함되어 있다.
구현 코드
Autencoder.py
import numpy as np
import matplotlib.pyplot as plt
from mpl_toolkits.mplot3d import Axes3D
from matplotlib import cm
from random import sample

import torch
import torch.nn as nn
import torch.nn.functional as F
import torch.optim as optim
import torchvision.models as models
from torchvision import datasets, transforms
from torch.utils.data import DataLoader

class AutoEncoder(nn.Module):
    def __init__(self):
        super(AutoEncoder, self).__init__()

        # 인코더는 간단하 신경망으로 분류모델처럼 생겼습니다.
        self.encoder = nn.Sequential( # nn.Sequential을 사용해 encoder와 decoder 두 모듈로 묶어줍니다.
            nn.Linear(28*28, 128), # 차원을 28*28에서 점차 줄여나간다.
            nn.ReLU(),
            nn.Linear(128, 64),
            nn.ReLU(),
            nn.Linear(64, 12),
            nn.ReLU(),
            nn.Linear(12, 3),
        )

        self.decoder = nn.Sequential(
            nn.Linear(3, 12), # 디코더는 차원을 점차 28*28로 복원한다.
            nn.ReLU(),
            nn.Linear(12, 64),
            nn.ReLU(),
            nn.Linear(64, 128),
            nn.ReLU(),
            nn.Linear(128, 28*28),
            nn.Sigmoid(), # 픽셀당 0과 1사이로 값을 출력하는 sigmoid()함수를 추가한다.
        )

    def forward(self, x):
        encoded = self.encoder(x) # encoder는 encoded라는 잠재 변수를 만들고
        decoded = self.decoder(encoded) # decoder를 통해 decoded라는 복원이미지를 만든다.
        return encoded, decoded


def visualize_latent_variable(autoencoder, trainset, device):
    classes = {
        0: 'T-shirt/top',
        1: 'Trouser',
        2: 'Pullover',
        3: 'Dress',
        4: 'Coat',
        5: 'Sandal',
        6: 'Shirt',
        7: 'Sneaker',
        8: 'Bag',
        9: 'Ankle boot'
    }

    fig = plt.figure(figsize=(10, 8))
    ax = Axes3D(fig)

    view_data = trainset.data[:200].view(-1, 28*28)
    view_data = view_data.type(torch.FloatTensor) / 255.
    test_x = view_data.to(device)
    encoded_data, _ = autoencoder(test_x)
    encoded_data = encoded_data.to("cpu")

    # latent variable의 각 차원을 numpy 행렬로 변환한다.
    X = encoded_data[:, 0].detach().numpy()
    Y = encoded_data[:, 1].detach().numpy()
    Z = encoded_data[:, 2].detach().numpy()

    labels = trainset.targets[:200].numpy()

    for x, y, z, s in zip(X, Y, Z, labels):
        name = classes[s]
        color = cm.rainbow(int(255 * s / 9))
        ax.text(x, y, z, name, backgroundcolor=color)

    ax.set_xlim(X.min(), X.max())
    ax.set_ylim(Y.min(), Y.max())
    ax.set_zlim(Z.min(), Z.max())
    plt.savefig(f'/workspace/Model_Implementation/GenerativeModel/AutoEncoder/autoencoder_results/latent_variable.png')


def draw_decoder_output(origin_data, autoenocder, epoch, device):
    view_img_size = 28

    test_x = origin_data.to(device)
    _, decoded_data = autoenocder(test_x)

    fig, ax = plt.subplots(2, 5, figsize=(5,2))
    print("[Epoch {}]".format(epoch))

    # 원본 데이터 출력
    for i in range(5):
        img = np.reshape(origin_data.data.numpy()[i], (28, 28)) # 파이토치 텐서를 넘파이로 변환
        ax[0][i].imshow(img, cmap='gray')
        ax[0][i].set_xticks(()); ax[0][i].set_yticks(())

    # 생성된 데이터 출력
    for i in range(5):
        img = np.reshape(decoded_data.data.cpu().numpy()[i], (28, 28))
        ax[1][i].imshow(img, cmap='gray')
        ax[1][i].set_xticks(()); ax[0][i].set_yticks(())

    plt.savefig(f'/workspace/Model_Implementation/GenerativeModel/AutoEncoder/autoencoder_results/{epoch}_img.png')


def train(epoch, autoencoder, train_loader, device, optimizer, criterion, origin_data):
    autoencoder.train()

    for epoch in range(0, epoch):
        for step, (x, label) in enumerate(train_loader):
            x = x.view(-1, 28*28).to(device)
            y = x.view(-1, 28*28).to(device) # x(입력)와 y(대상 레이블) 모두 원본이미지 x이다.
            label = label.to(device)

            encoded, decoded = autoencoder(x)

            loss = criterion(decoded, y)
            optimizer.zero_grad()
            loss.backward()
            optimizer.step()

        draw_decoder_output(origin_data, autoencoder, epoch, device)

    return autoencoder


def main():
    MODEL_SAVE_PATH = r"/workspace/Model_Implementation/GenerativeModel/AutoEncoder/autoencoder_models/autoencoder.pt"
    epoch = 50
    batch_size = 64
    use_cuda = torch.cuda.is_available()
    device = torch.device('cuda:0' if use_cuda else 'cpu')
    print("Using Devcie:", device)

    trainset = datasets.FashionMNIST(
        root='./data/',
        train=True,
        download=True,
        transform=transforms.ToTensor()
    )

    train_loader = DataLoader(dataset=trainset, batch_size=batch_size, shuffle=True)

    autoencoder = AutoEncoder().to(device)
    optimizer = torch.optim.Adam(autoencoder.parameters(), lr=0.005)
    criterion = nn.MSELoss() # 원본값과 디코더에서 나온 값의 차이를 계산하기 위해 MSE 오차함수를 사용한다.

    origin_data = trainset.data[:5].view(-1, 28*28)
    origin_data = origin_data.type(torch.FloatTensor) / 255.

    model = train(epoch, autoencoder, train_loader, device, optimizer, criterion, origin_data)
    torch.save(model.state_dict(), MODEL_SAVE_PATH)


if __name__ == '__main__':
    main()
use_autoencoder.py
import torch
import matplotlib.pyplot as plt
import numpy as np

from autoencoder import AutoEncoder
from autoencoder import draw_decoder_output


if __name__ == '__main__':
    MODEL_SAVE_PATH = \
        r"/workspace/Model_Implementation/GenerativeModel/AutoEncoder/autoencoder_models/autoencoder.pt"
    RESULT_SAVE_PATH = \
        r"/workspace/Model_Implementation/GenerativeModel/AutoEncoder/autoencoder_results/test_img.png"


    device = torch.device('cuda')
    autoencoder = AutoEncoder()
    autoencoder.load_state_dict(torch.load(MODEL_SAVE_PATH))
    autoencoder.to(device)

    # rand_noise = torch.randn((28, 28))
    rand_noise = torch.rand((28, 28))
    rand_noise = rand_noise.view(-1, 28*28).to(device)

    encoded_data, decoded_data = autoencoder(rand_noise)

    fig, ax = plt.subplots(3, 1, figsize=(5, 5), squeeze=False)

    # 입력 이미지
    img = np.reshape(rand_noise.cpu().numpy(), (28, 28))
    ax[0][0].imshow(img, cmap='gray')

    # 인코딩 이미지
    img = np.reshape(encoded_data.detach().cpu().numpy(), (1, 3))
    print("IMG: ", img)
    ax[1][0].imshow(img, cmap='gray')

    # 생성된 이미지
    img = np.reshape(decoded_data.data.cpu().numpy(), (28, 28))
    ax[2][0].imshow(img, cmap='gray')


    plt.savefig(RESULT_SAVE_PATH)
학습된 오토인코더 모델에 Random noise를 넣었을 때도 output은 무엇이 나올까?

나의 예상은 값을 제대로 latent값으로 매핑하지 못하여 decoding된 결과 값은 fashion_mnist와 동떨어진 결과가 나올 것이라고 생각했지만 전혀 달랐다.
최상단 이미지의 노이즈는 torch.rand()로 만든 28x28의 uniform한 noise이다. torch.randn()을 통한 28x28 gaussian noise로도 테스트를 해보았지만, 두 노이즈 모두 다 encoding후 decoding이 되면 fashion_mnist의 이미지가 나오게 된다.
torch.rand()를 통한 생성
torch.rand()로 28x28 노이즈를 생성하여 입력하면 계속해서 티셔츠 이미지가 나온다.
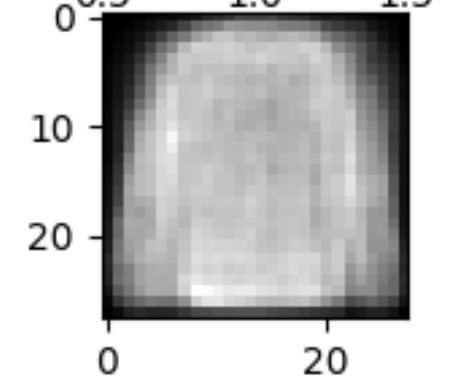
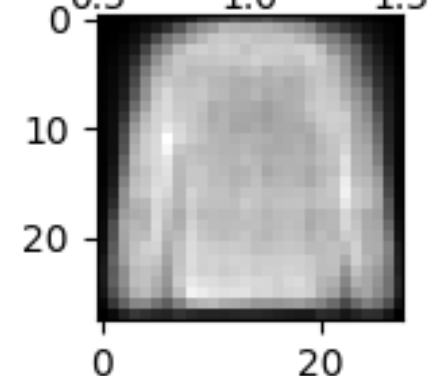

티셔츠의 형태는 조금씩 다르지만, 티셔츠가 계속해서 decoding되는 것을 볼 수 있다. 1x3의 latent 값을 출력해보면 다음과 같다.
IMG:  [[-8.3908205 -1.5843557 -5.1834235]]
IMG:  [[-7.4883347 -1.6274408 -4.513466 ]]
IMG:  [[-7.6311865 -1.6815815 -4.5698814]]
IMG:  [[-7.3199997 -0.9594991 -4.333098 ]]
IMG:  [[-8.659631  -1.2253071 -5.8348384]]
IMG:  [[-6.5923905 -1.2259407 -2.5374963]]
모두 비슷한 값의 latent variable값처럼 보인다.
해당 latent값을 gary scale로 출력해보면, 맨 우측 값의 색깔이 얼마나 진하냐에 따라 값이 달라진다.


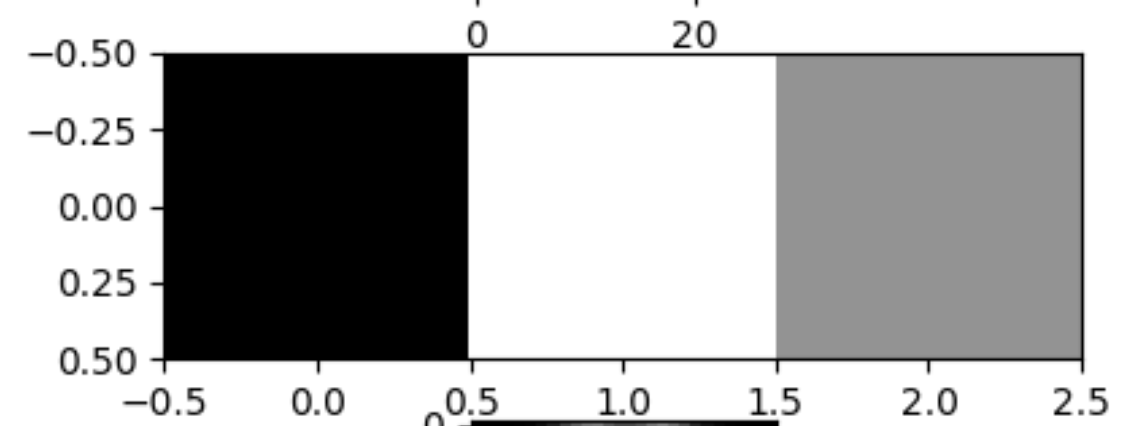
torch.rand함수를 사용하여 뽑은 uniform한 28x28 난수값인데 해당 노이즈 이미지를 encoder에 넣으니 latent값이 비슷하게 나오는 것을 보여준다. 이런 부분은 신기한 부분이라고 생각하는데, 추후 이유를 찾아보아야할 것 같다.
uniform하다는 것은 특정 값의 범위안에 있는 값들이 모두 같은 동일한 확률로 뽑힌다는 것(주사위의 각 면이 나올 확률이 $\frac{1}{6}$ 인 것과 같은 의미.)이다.
torch.randn()을 입력 이미지로 넣은 생성

우선 torch.randn()을 통해 만든 노이즈는 latent의 픽셀값부터 다르게나온다. 이를 통해 decoding된 결과도 티셔츠에 국한되는 것이 아니라 다양한 종류의 이미지가 나오는 것을 확인할 수 있다.

torch.rand()의 노이즈 이미지와 torch.randn() 노이즈 이미지의 비교


좌측 이미지는 rand()를 통해 생성한 노이즈고 우측은 randn()을 통해 생성한 노이즈이다. 왜 이런 형태의 차이를 가지게 되는 것일까 고민해보았는데, 우선 uniform하게 데이터를 값을 추출하는 rand()함수는 값이 0~1의 범위에서 동일한 확률로 값이 추출된다.
그러니 rand()의 출력은 검은색부분과 흰색부분이 동시에 많이 섞여있을 수 있지만, randn()을 통해 값을 뽑는 것은 평균이 0이고, 표준편차가 1인 표준정규분포에서 값을 뽑는 것이다. 그래서 값 범위가 -4~4정도를 가지기도 하고, 평균 0값주변에서 여러값들이 많이 추출되므로 상대적으로 왼쪽 노이즈이미지보다 균일하게 보이는 것이다.
근데 그럼 이미지가 주어지는 조건이 동일하지 않다는 것을 깨달았다.
- 모델을 학습할 때는 MNIST이미지의 픽셀값을 0~1로 정규화하여 학습했다.
- rand()를 통해 모델에 넣은 28x28 노이즈 입력은 0~1사이의 값의 범위를 가진다.
- randn()를 통해 모델에 넣은 28x28 노이즈 입력은 대략 -4~4사이의 값의 범위를 가진다.
그럼 randn()으로 만든 노이즈를 다시 0~1로 값을 정규화하여 입력하면 어떻게 될까?
torch.randn() 출력값을 다시 0~1로 정규화 한 뒤 입력
코드를 살펴보자
def train(epoch, autoencoder, train_loader, device, optimizer, criterion, origin_data):
    autoencoder.train()

    for epoch in range(0, epoch):
        for step, (x, label) in enumerate(train_loader):
            x = x.view(-1, 28*28).to(device)
            y = x.view(-1, 28*28).to(device) # x(입력)와 y(대상 레이블) 모두 원본이미지 x이다.
            label = label.to(device)

            encoded, decoded = autoencoder(x)

            loss = criterion(decoded, y)
            optimizer.zero_grad()
            loss.backward()
            optimizer.step()

        draw_decoder_output(origin_data, autoencoder, epoch, device)

    return autoencoder
왜 이럴까?
학습코드를 살펴보면 decoding된 값과 원본 이미지의 값이 같아지도록 loss를 취한다. 이 말은 어떤 결과든 y값(원본 이미지)이 나오도록 학습한다는 것인데, 결과적으로 latent로 값이 압축만 된다면 fashion mnist의 결과가 나올 것이라고 생각한다.
-----
Latent variable 출력

def visualize_latent_variable(autoencoder, trainset, device):
    """
    data를 encoding한 후, 각 차원을 numpy행렬로 변환하여 시각화한다.
    """

    classes = {
        0: 'T-shirt/top',
        1: 'Trouser',
        2: 'Pullover',
        3: 'Dress',
        4: 'Coat',
        5: 'Sandal',
        6: 'Shirt',
        7: 'Sneaker',
        8: 'Bag',
        9: 'Ankle boot'
    }

    fig = plt.figure(figsize=(10, 8))
    ax = fig.add_subplot(111, projection='3d') # 출력이 안되어 원본 출처의 코드를 해당 코드로 변경하였다.


    view_data = trainset.data[:200].view(-1, 28*28)
    view_data = view_data.type(torch.FloatTensor) / 255.
    test_x = view_data.to(device)
    encoded_data, _ = autoencoder(test_x)
    encoded_data = encoded_data.to("cpu")

    # latent variable의 각 차원을 numpy 행렬로 변환한다.
    X = encoded_data[:, 0].detach().numpy()
    Y = encoded_data[:, 1].detach().numpy()
    Z = encoded_data[:, 2].detach().numpy()

    labels = trainset.targets[:200].numpy()

    for x, y, z, s in zip(X, Y, Z, labels):
        name = classes[s]
        color = cm.rainbow(int(255 * s / 9))
        ax.text(x, y, z, name, backgroundcolor=color)

    ax.set_xlim(X.min(), X.max())
    ax.set_ylim(Y.min(), Y.max())
    ax.set_zlim(Z.min(), Z.max())

    plt.savefig(f'/workspace/Model_Implementation/GenerativeModel/AutoEncoder/autoencoder_results/latent_variable.png')
Convolution을 통한 Autoencoder 구현
class AutoEncoderConv(nn.Module):
    def __init__(self):
        super(AutoEncoderConv, self).__init__()

        self.encoder = nn.Sequential(
            # 28x28 -> 14x14
            nn.Conv2d(1, 64, 3, stride=1, padding=1),
            nn.Conv2d(64, 128, 3, stride=2, padding=1),
            nn.ReLU(),

            # 14x14 -> 7x7
            nn.Conv2d(128, 128, 3, stride=1, padding=1),
            nn.Conv2d(128, 256, 3, stride=2, padding=1),
            nn.ReLU(),

            # 7x7 -> 3x3
            nn.Conv2d(256, 256, 3, stride=1, padding=1),
            nn.Conv2d(256, 512, 4, stride=2, padding=1),
            nn.ReLU(),
        )

        self.decoder = nn.Sequential(
            # 3x3 -> 7x7
            nn.Conv2d(512, 512, 3, stride=1, padding=1),
            nn.ConvTranspose2d(512, 256, 3, stride=2, padding=0, output_padding=0),
            nn.ReLU(),

            # 7x7 -> 14x14
            nn.Conv2d(256, 256, 3, stride=1, padding=1),
            nn.ConvTranspose2d(256, 128, 3, stride=2, padding=1, output_padding=1),
            nn.ReLU(),

            # 14x14 -> 28x28
            nn.Conv2d(128, 128, 3, stride=1, padding=1),
            nn.ConvTranspose2d(128, 64, 3, stride=2, padding=1, output_padding=1),
            nn.ReLU(),

            nn.Conv2d(64, 1, 3, stride=1, padding=1),
        )


    def forward(self, x):
        encoded = self.encoder(x)
        decoded = self.decoder(encoded)
        return encoded, decoded
학습 결과
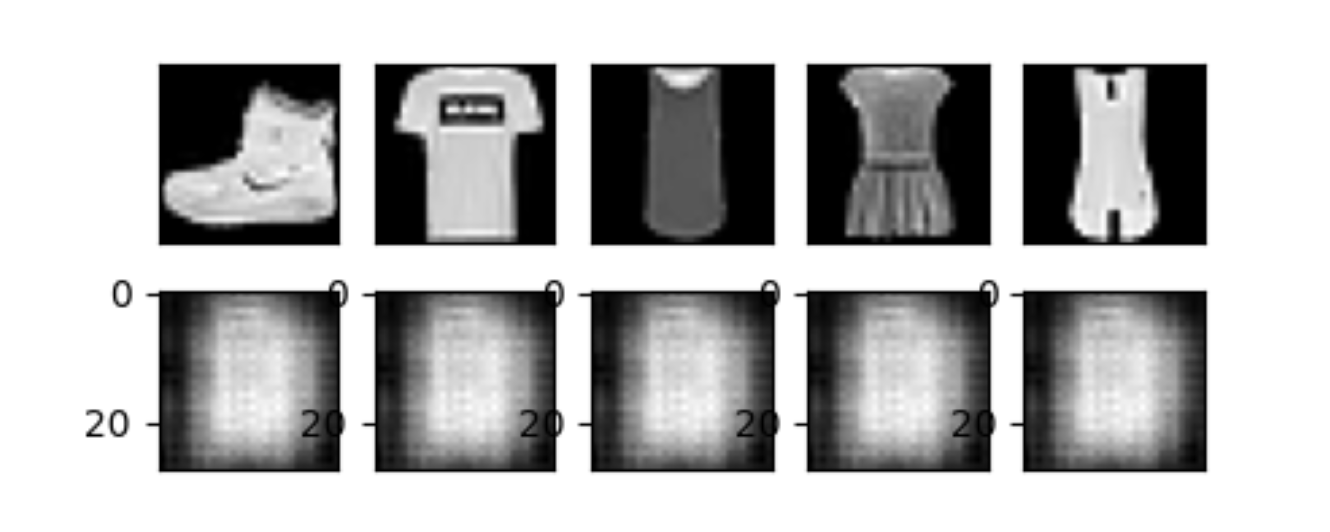
epoch 0 ~ 6의 결과
epoch 7~33의 결과
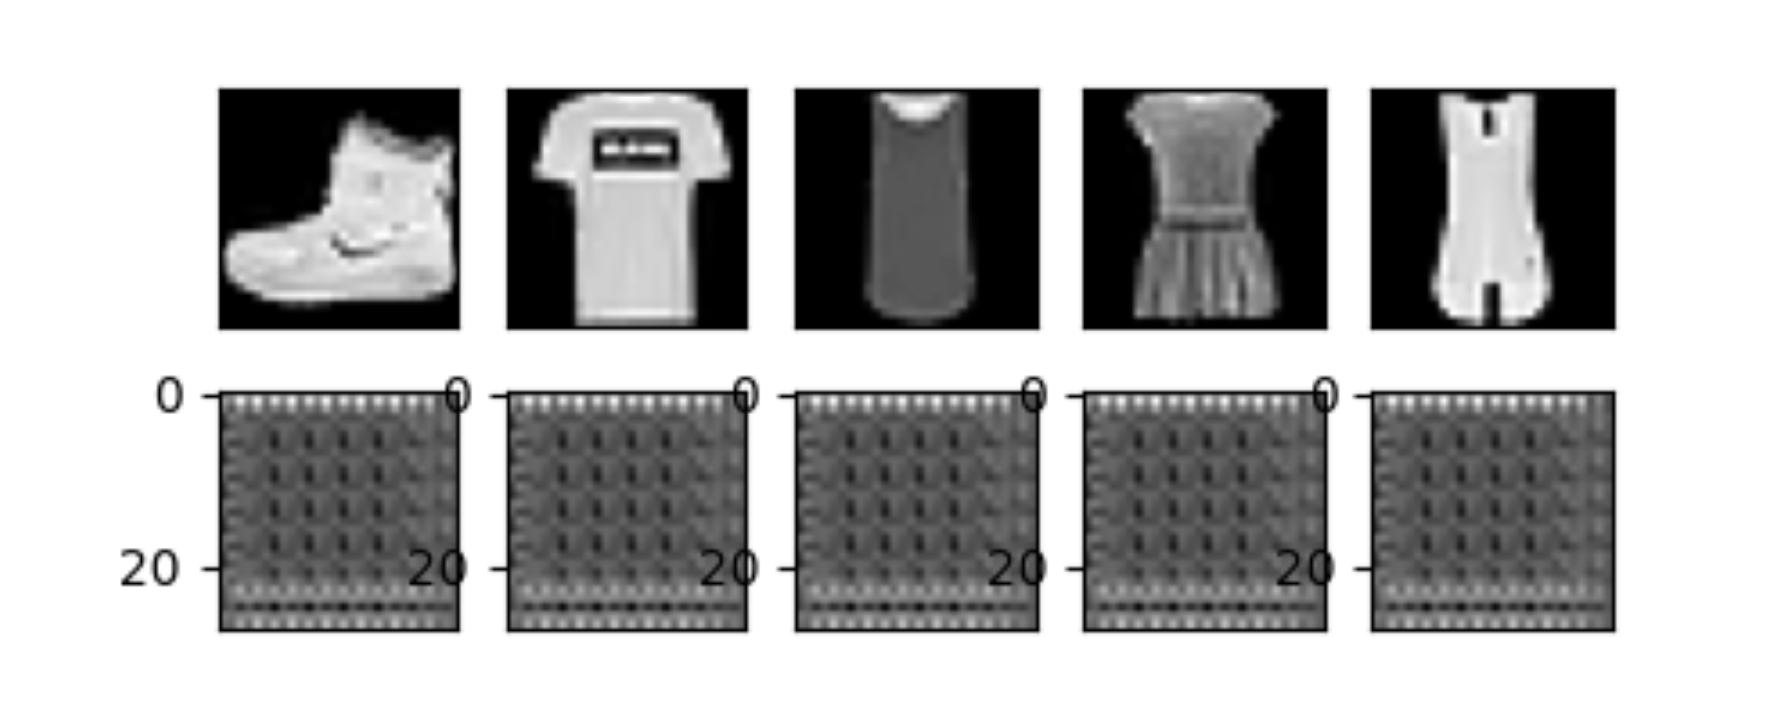
epoch 34~38의 결과

epoch 39~49의 결과

점점 학습이 제대로 안나오는 것을 확인할 수 있는데, 왜 이렇게 나오는지에 대해 고민을 할 필요가 있다.
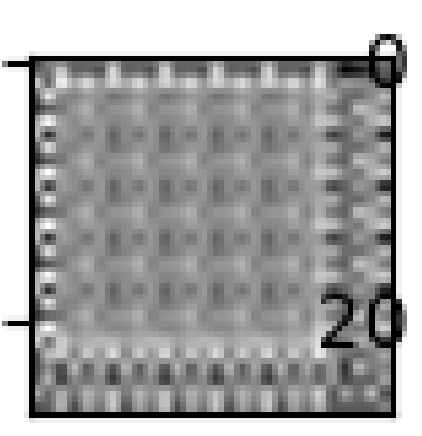
Decoding된 결과물 요약
 |
 |
 |
 |
해당 문제의 원인은 피처맵이 너무 많은 것이 문제였다. 피처맵이 많아 문제가 생기는 것을 눈으로 확인할 수 있는 좋은 결과였다.
작동되는 Convolution의 Autoencoder들
class AutoEncoderConv0(nn.Module):
    def __init__(self):
        super(AutoEncoderConv0, self).__init__()

        self.encoder = nn.Sequential(
            # 28x28 -> 14x14
            nn.Conv2d(1, 16, 3, stride=1, padding=1),  # 32 -> 16
            nn.Conv2d(16, 32, 3, stride=2, padding=1),  # 64 -> 32
            nn.ReLU(),

            # 14x14 -> 7x7
            nn.Conv2d(32, 32, 3, stride=1, padding=1),
            nn.Conv2d(32, 64, 3, stride=2, padding=1),  # 128 -> 64
            nn.ReLU(),

            # 7x7 -> 3x3
            nn.Conv2d(64, 64, 3, stride=1, padding=1),
            nn.Conv2d(64, 128, 4, stride=2, padding=1),  # 256 -> 128
            nn.ReLU(),
        )

        self.decoder = nn.Sequential(
            # 3x3 -> 7x7
            nn.Conv2d(128, 128, 3, stride=1, padding=1),
            nn.ConvTranspose2d(128, 64, 3, stride=2, padding=0, output_padding=0),
            nn.ReLU(),

            # 7x7 -> 14x14
            nn.Conv2d(64, 32, 3, stride=1, padding=1),
            nn.ConvTranspose2d(32, 16, 3, stride=2, padding=1, output_padding=1),
            nn.ReLU(),

            # 14x14 -> 28x28
            nn.Conv2d(16, 16, 3, stride=1, padding=1),
            nn.ConvTranspose2d(16, 8, 3, stride=2, padding=1, output_padding=1),  # 32 -> 8
            nn.ReLU(),

            nn.Conv2d(8, 1, 3, stride=1, padding=1),
            nn.Sigmoid()
        )

    def forward(self, x):
        encoded = self.encoder(x)
        decoded = self.decoder(encoded)
        return encoded, decoded
이처럼 피처맵 개수를 줄여서 학습하도록 하면, 결과가 제대로 나오기 시작한다.
class AutoEncoderConv2(nn.Module):
    # TODO: 28x28에서 돌아가도록 수정하기 -> 만약 뒤에도 안된다면 이건 데이터 전달이 잘못된지도 확인이 필요할지도..
    def __init__(self):
        super(AutoEncoderConv2, self).__init__()

        # Encoder
        self.encoder = nn.Sequential(
            nn.Conv2d(1, 16, kernel_size=3, stride=1, padding=1),
            nn.ReLU(),
            nn.MaxPool2d(2,2),

            nn.Conv2d(16, 32, kernel_size=3, stride=1, padding=1),
            nn.ReLU(),
            nn.MaxPool2d(2,2)
        )

        self.decoder = nn.Sequential(
            nn.ConvTranspose2d(32, 16, kernel_size = 2, stride = 2, padding=0),
            nn.ReLU(),

            nn.ConvTranspose2d(16, 1, kernel_size = 2, stride = 2, padding=0),
            nn.Sigmoid()
        )


    def forward(self, x):
        encoded = self.encoder(x)
        decoded = self.decoder(encoded)
        return encoded, decoded
물론 이처럼 pooling을 통해 이미지 사이즈를 감소시키는 방식으로도 충분히 잘 학습된다. AutoEncoderConv0 클래스는 pooling없이 conv만으로도 pooling과 같은 역할을 할 수 있는지 테스트해본 것에 의의가 있으며, AutoEncoderConv0 클래스와 AutoEncoderConv2 클래스 모두 잘 수렴하며 학습한다.
'Machine Learning' 카테고리의 다른 글
| [ML] Local connectivity, Global connectivity (0) | 2024.04.15 |
|---|---|
| [ML] Conditional GAN (0) | 2023.12.18 |

